Setting up the project: Physics Engine Tutorial 0

31/3/2023
For the last few months, I've been writing almost exclusively about my game. I'm still working on it, and I'll be posting more devlogs, but I also want to write about other stuff. So this will be the first in a series of tutorials about making a physics engine from scratch with C#. Why? Because I like physics. So without further ado, let's get started.
Creating the project and making the visualisation
Before we start making a physics simulation, we need some way to view what the simulation is computing. For the sake of simplicity, I'll use Raylib, and it's C# bindings. It's very easy to pick up (I hadn't ever used it, but I found my way around it in less than a day) and its simplicity will allow us to focus oon the physics. Furthermore, I'll be using Visual Studio to do the coding, so the process I'll describe for installing the library will be for Visual Studio.
First, I created a new C# project. To get a clean slate, I chose a Console App. I named the solution PhysicsSim and the project PhysicsSimTester, but you can choose other names. Then I added another project to the solution, specifically a class library, named PhysicsSim. The class library will be the actual physics simulator, while the console app will only use it, in order to allow us to test our physics code. From now on, I'll refer to the class library as the 'library' and to the console app as the 'tester' We'll be starting by making a particle based engine, and then upgrade it to handle rigidbodies. So let's add a new class called Particle to the library. For now, I'll leave it blank. We'll come back to it later, I only added it this soon so we can prepare a skeleton for the testing code. That way, I can get it out of the way early, and then focus on implementing the physics.
Now we need to install the raylib-cs NuGet package. If you don't know how to install a NuGet package, search it up. Also, we'll have to add a reference to the library in the tester. With this out of the way, we can start coding. Let's open up the autogenerated Program.cs in the tester. At the top we'll add references to Raylib, the physics library and to the tester namespace
1 using Raylib_cs; 2 using PhysicsSim; 3 using PhysicsSimTester;
Inside the Main function, we'll write the following code:
1 private static void Main(string[] args) 2 // Initialize Raylib 3 Raylib.InitWindow(800, 800, "Physics Sim"); 4 Raylib.SetTraceLogLevel(TraceLogLevel.LOG_ALL); 5 Raylib.SetTargetFPS(200); 6 7 // Core loop 8 while(!Raylib.WindowShouldClose()) { 9 Raylib.BeginDrawing(); 10 Raylib.ClearBackground(Color.BLACK); 11 Raylib.DrawCircle(400, 400, 100, Color.WHITE); 12 Raylib.EndDrawing(); 13 } 14 15 Raylib.CloseWindow(); 16 }
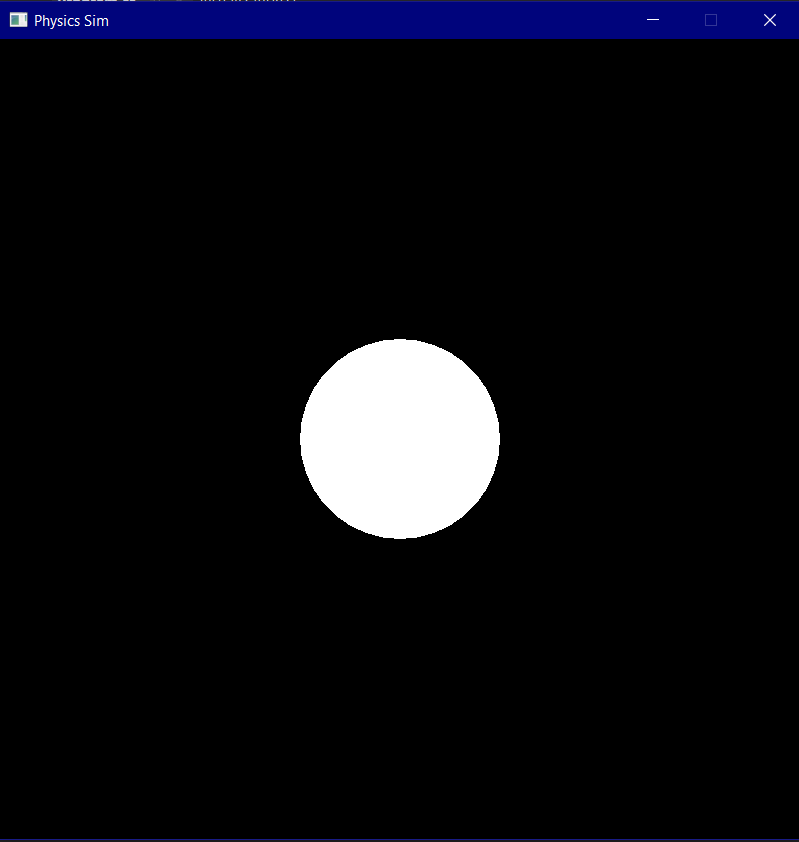
First, we open a 800 by 800 window, tell Raylib to log everything and set the framerate to 200. Then we loop until Raylib tells us we should close the window. Every frame, we prepare for drawing, clear the canvas, draw a circle and send out the new frame. If you run this code, you should get something like fig. 1.

A simple Raylib program.
Next we'll add a Visualisation class. This will be what actually draws things to the screen in the final program.
1 using PhysicsSim; 2 using Raylib_cs; 3 4 namespace PhysicsSimTester 5 { 6 public static class Visualization 7 { 8 public static int Res; 9 public static int TextUnits { get => Res / 100; } 10 public static Font font; 11 12 // Variables used for the debug interface 13 private struct SmoothDebugFloat { 14 private const int cacheMax = 64; 15 private int currentIndex; 16 private float[] cachedValues; 17 private float sum; 18 public float AverageValue { get => sum / cacheMax; } 19 20 public SmoothDebugFloat() { 21 currentIndex = 0; 22 cachedValues = new float[cacheMax]; 23 sum = 0; 24 } 25 public void FeedValue(float value) { 26 sum -= cachedValues[currentIndex]; 27 sum += value; 28 cachedValues[currentIndex] = value; 29 currentIndex = (currentIndex + 1) % cacheMax; 30 } 31 } 32 private static SmoothDebugFloat deltaTime; 33 34 35 public static void Init(int res) { 36 // Set the resolution 37 Res = res; 38 39 // Initialize Raylib 40 Raylib.InitWindow(Res, Res, "Physics Sim"); 41 Raylib.SetTraceLogLevel(TraceLogLevel.LOG_ALL); 42 Raylib.SetTargetFPS(200); 43 // Load a better font 44 font = Raylib.LoadFontEx("times.ttf", 256, null, 1024); 45 46 deltaTime = new SmoothDebugFloat(); 47 } 48 49 public static void DrawAll(params Particle[] objects) { 50 foreach (var obj in objects) { 51 Draw(obj); 52 } 53 } 54 public static void Draw(Particle obj) { 55 56 } 57 58 public static void DrawDebugInterface(float dt) { 59 // Feed the delta time to the corresponding smooth value 60 deltaTime.FeedValue(dt); 61 62 // Write info to the screen 63 DrawDebugLine($"{objects.Length} objects @ {(1 / deltaTime.AverageValue).ToString("F0")} FPS", 2, 2); 64 DrawDebugLine($"{(dt*1000).ToString("F4")}Δt (in ms)", 2, 4); 65 } 66 private static void DrawDebugLine(string line, float x, float y) { 67 Raylib.DrawTextEx(font, line, new System.Numerics.Vector2(x * ScreenUnit, y * ScreenUnit), 68 (int)(2.6 * ScreenUnit), (int)(ScreenUnit / 3), Color.RAYWHITE); 69 } 70 private static void DrawDebugLine(string line, float x, float y, Color color) { 71 Raylib.DrawTextEx(font, line, new System.Numerics.Vector2(x * ScreenUnit, y * ScreenUnit), 72 (int)(2.6 * ScreenUnit), (int)(ScreenUnit / 3), color); 73 } 74 } 75 }
Thats's a lot, so let's break it down. Firstly, we declare a few variables for convenience. Next we declare the SmoothDebugFloat struct. This struct holds a list ov previous values of something and computes their average. This way, values that change very fast are smoothed. As we need to write more and more debug info, this will become very usefull. For now, we're using it only for delta time. Then we initialize the visualization. We set the resolution, open a window, set the log level (what kind of info Raylib should output to the console), set the desired FPS, load a font ant initialize our delta time. Next, the DrawAll function receives a list of particles and Draws each one of them. For now, we don't actually ddraw anything. Finally, we have a function to draw some debug info to the screen.
For the font loading to work, it is necessary to have a font file in the same folder as the program. To get the file, if you're on Windows, you can go to C:\Windows\Fonts and search for the font family you want (for instance, I chose Times New Roman). Then open it and copy the specific font (I chose the normal one, but you could use bold or italic). Open your project's root folder and navigate to the folder where the .exe file is, and paste the font file.
Now it's only a matter of calling these functions from Main.
1 private static void Main(string[] args) 2 // Init the visualization 3 Visualization.Init(800); 4 5 // Core loop 6 while(!Raylib.WindowShouldClose()) { 7 Raylib.BeginDrawing(); 8 Raylib.ClearBackground(Color.BLACK); 9 Visualization.DrawAll(); 10 Visualization.DrawDebugInterface(Raylib.GetFrameTime()); 11 Raylib.EndDrawing(); 12 } 13 14 Raylib.CloseWindow(); 15 }
And this concludes what we could call the frontend of this app. Before we start implementing the simulation itself, it's necessary to review a lot of maths and physics. So, not to make this post enormous, I'll postpone that for the next post, making this one a shorter one. I'm really excited for this project, and I hopefully so are you. Until the next time, have some fun toying around with Raylib! As a side note, I'd advise you to study some calculus and linear algebra while you're waiting for the next post, especially if you don't know much about these topics, because they'll be very important. And finally, you can find the source code for this project (although at a later stage) on GitHub.